Sunday, January 27, 2013

VD is alright by me!

And when I say VD I mean Valentine's Day (where was your mind you sicko?).

I recently acquired a bunch of lovely FREE fabric (love the free part) and quite a bit of it had a rather romantic theme to it, so I thought I guess this is a sign that I need to do a lovey-dovey type bag at the least. This is what I came up with.

Photobucket

Photobucket

Photobucket

This is my favorite patch; it reminds me of elementary school and all the little notes that got passed around, so innocent and silly.

Photobucket

Even the lining has little hearts.

Photobucket

I still have a lot more of this type of fabric so maybe there will be more in the future, but in any case, this jem is available in my shop now! Perfect for the month of love coming up =)

Monday, January 21, 2013

Don't Blink! Whatever you do Don't Blink!

So there's a saying that goes, "that which holds the image of an angel becomes itself an angel," and in that case, we're all in trouble...and it's all my fault. Oops. Ok so I'm not talking about your standard fluffy baby with white downy wings that goes around with a halo over it's head. I'm talking about the super awesome, very scary weeping angels that are the best Doctor Who villains in my humble opinion.

I have a friend who is an equally big Doctor Who nerd (or perhaps even bigger, it is very possible), and I decided for one of her Christmas presents I was going to attempt to paint a weeping angel! Now I'm not known for my painting skill, and I would not really claim to have any to begin with, but ever since my drawing classes at college, and my newfound awareness for light and shadow and generally being able to render a somewhat accurate representation of objects in 3-D I thought it would be a fun project to attempt. And if I failed I'd burn it and no one would ever know. But to my delight and surprise the painting came out rather well (for a beginner anyway).

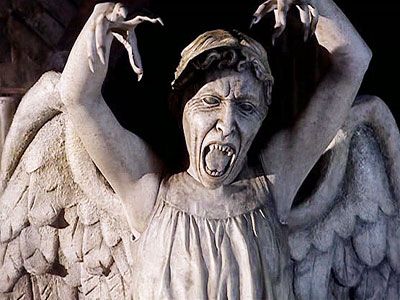
Here was my primary reference image

Photobucket

And the final product!

Photobucket

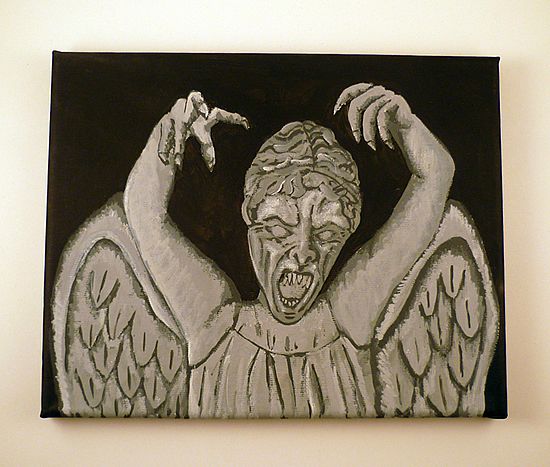
I was using acrylic paints and I know that they have a tendency to dry very quickly but I was surprised by just how quickly that was; blending the shades was quite a challenge! I think I did it well enough but of course AFTER I finished the painting I researched mediums to extend the drying time, thus allowing more time for blending, and remembered something called acrylic retarding medium. Duh. Well next time I'll pick some up. But in any case I'm happy with how this came out. The background is a bit flat for my tastes but I don't want to ruin it when I'm happy with how it is as it stands.

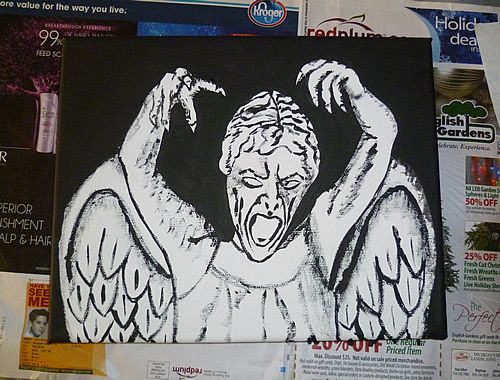
Here's some progress pictures!

The first layer: all black. I was trying to sketch out the darkest shadows and planned to do shades of grey over it. Ironically when I put the grey on top it almost completely covered up the black areas which was surprising. But I recovered.

Photobucket

More layering, trying to flesh out the shadows and light.

Photobucket

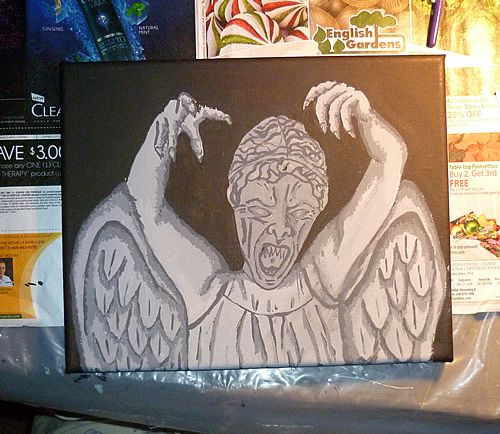
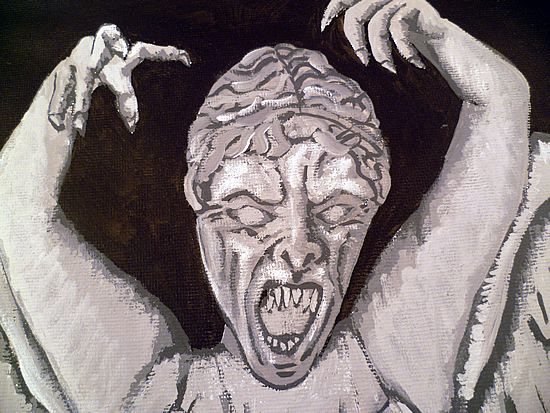
Close up! Ahh! Scary!
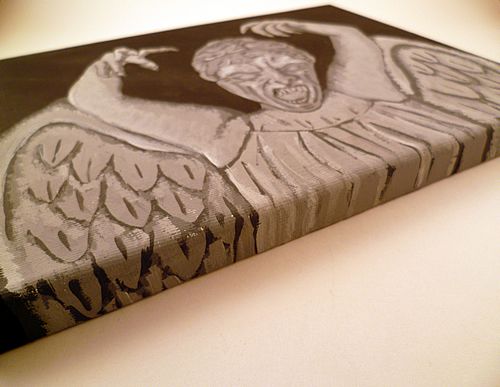
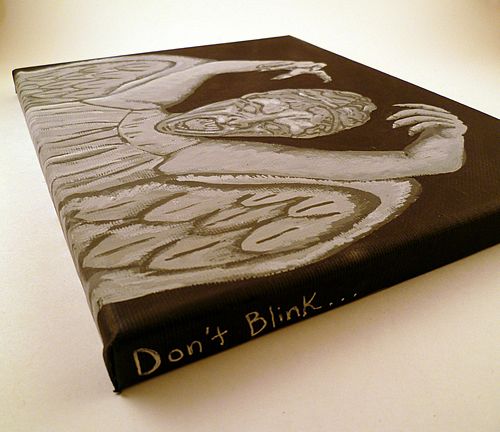
Photobucket

Shots of the edges.

Photobucket

Photobucket

I really am happy with how this turned out and it makes me want to paint more. Now what will be my next subject!?


Edit: I was watching The Nightmare Before Christmas and made a shocking discovery!!!!

Photobucket

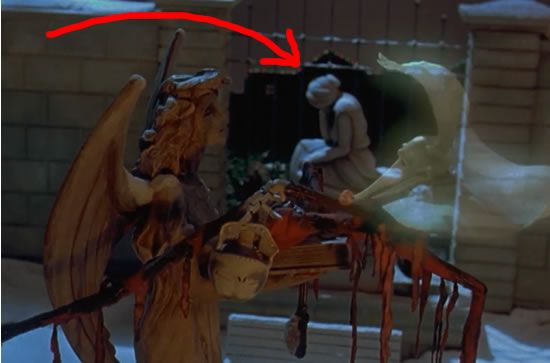
Weeping angels have long since infiltrated that world as well! Is there now where safe?!


Saturday, January 19, 2013

The Life of a Wage Slave

I was cleaning up the bedroom last week and stumbled across an old project I made in school when I was taking a Book Arts class. It was a lot of fun and this particular project is a lot funnier than I remember it being.

We had to make a book based on a style of book binding called........um don't remember that part, sorry. It was basically a complex folded book that allowed you to have insert cards for each page. In addition to this we made book cases for our books (we could chose to make one for all the books we made in the class or for just one book as I did).

Book in case

Photobucket

Book out of case.

Photobucket

And look at the fancy inner lining I made, stars, fun.

Photobucket

We were supposed to have some sort of running theme through all the books we made in the class and my theme was "the detritus of my life" or basically all the found paper, junk, crap that fills up my daily life. Each of the books were themed School, Home, Car, and Work respectively (I came up with Car because I couldn't think of another actual location so it works. I'm in my car a lot).

This may be a little revealing of my general feelings towards work. Hah. Oh and for further insight I work at a Bank. All the little bits of paper glued into the book are actually from work.

All the pages together

Photobucket

And closeups of my favorite pages - and no that's not real money if you were fooled. I'm not that rich!

Photobucket

Photobucket

Photobucket

Photobucket

Each page represented a day of the work week, and each page was glued into the slot rather than being removable.

I suppose work isn't THAT bad, and I enjoy the people I work with. But I'd love to be able to make art my full time job some day. Until then I will continue to dream.

Sunday, January 13, 2013

Are you Sherlocked?! I am!

John Watson: It's a head. A severed head.
Sherlock Holmes: Just tea for me, thanks.
John Watson: No there's a head in the fridge!
Sherlock Holmes: Yes?
John Watson: A bloody head!
Sherlock Holmes: Where else am I supposed to put it? You don't mind, do you?

Just a brief interlude from one of the episodes that I thought I'd share. Gotta love it.

And because there was just too many fun quotables and moments that couldn't be ignored I made a bag!

Photobucket

My favorite patch! So puffy and great.

Photobucket

Photobucket

Photobucket

Photobucket

Photobucket

Photobucket

Seriously, if you haven't seen it, do it now!

This bag and a bunch of NEW BAGS!! are now available in my shop =) I finally got around to doing a giant update (and have two more bags to post tomorrow just fyi). I'm dwelling on what to work on next. I thought I was going to take a break from making bags but now I've got a bug to work on another Star Wars themed bag for some strange reason. Game of Thrones is still on my list as well, maybe I'll do that too.

Monday, January 7, 2013

In Memorandum

A dear friend has passed this week. A friend who has sat by me quietly for many a days keeping solemn comfort. Yes, it is my bag of poly fill.

I wanted to take time to remember him today as he was, and not as he now is (in the garbage, oops!). I bought him some time in September of 2011, a complete newbie to the ways and skills of the Teesha Moore patchwork style. I made my first bag for a Christmas swap and sent it off to live in New York.

First Bag

Photobucket

Since then my style has changed and evolved and I complete Polyfill's life with one of my well known Harry Potter bags.

Last Bag

Photobucket


Photobucket

In between I calculated that I have made a total of 36 bags (this does not include pouches, wallets, or any other miscellaneous patchwork items I've experimented with) and made over 792! individual panels. Polyfill lived a good life, and in everything I've made he lives on.

Photobucket


.....................now to start on my new polyfill bag! 28 oz I believe =)

Thursday, January 3, 2013

Scrappy Straps for your Scrappy Bags: A Tutorial

New year!! Yay! I hope everyone had a safe and fun new year. I stayed at home and stitched all day long. It was nice to get into that groove again and now I am re-energized to make a bunch of new bags. I especially excited because I am going to be tackling some new themes!! Sherlock! Valentines day!....well that has more to do with the fact that I inherited a bunch of lovey dovey type fabrics and with the holiday coming up I thought "why not!"

Since I started making my patchwork bags I've had a lot of people ask me how I make my scrappy strap to go with it. I've explained it but I'm always one for a tutorial with pictures, so I've finally remembered to take pictures so I can share it with you now!

Start with a bunch of fabric scraps. Cut them into strips about 2 inches wide; length is irrelevant, I have bunches that are short and bunches that are long. Now remember, there is no right or wrong here, it can be a bit thicker, it can be a bit thinner. I've found that 2 inches wide is the sweet spot to make sure your strap doesn't end up too flimsy (in my opinion).

Photobucket

Photobucket

Take your first two strips and sew them together overlapping about 2 inches. Now at this point if they're relatively short strips, I just keep sewing down one strip, taking the next piece and overlapping and keep the needle running (hope this is making sense!). If it's a longer piece, I run the needle back and forth a couple of times on the overlap between two strips and then cut the thread there. No need to waste thread when you're not going to have another overlap for quite a bit (if the strip is long).

Photobucket

Photobucket

Once you have a long long chain of strips, step away from your machine. I cut this long chain into 6 smaller pieces, roughly the length of my arms stretched out.

Photobucket

Photobucket

Photobucket

Gather the ends of all 6 pieces and sew them together.

Photobucket

Photobucket

Find someplace to anchor the end of your strips - I use a chair back (very high tech I know) - and separate the strips into 3 sections of 2. Braid the strips now.

Photobucket

Photobucket

Once you've braided it to the length of your choosing, sew the other end and trim.

Photobucket

Now you're ready to sew it onto your bag!

Photobucket

Photobucket
Related Posts Plugin for WordPress, Blogger...