There are many ways you can go about applying an image to your frame for printing and I'm going to concentrate on the techniques I use the most: Contact paper stencils and drawing fluid/screen filler.
Contact paper stencils are pretty self-explantory; create a stencil with contact paper (like you would do with a freezer paper stencil). Having "floating islands" or bits of stencil that are not connected to the main body of the stencil is perfectly fine but for a beginner keeping those to a minimum is probably best.
For the drawing fluid/screen filler method I did prepare a more elaborate explanation.
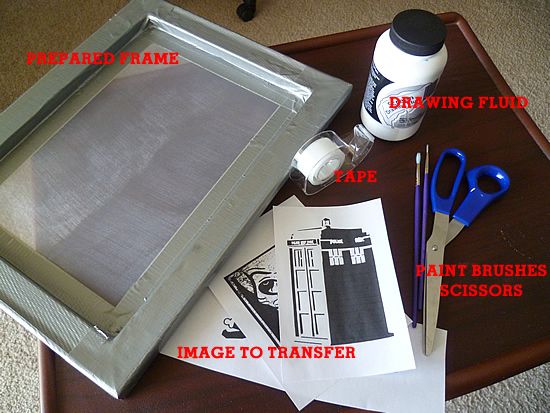
To apply the drawing fluid you will need:
Prepared frame (see above)
Drawing fluid
Paint brushes
Scissors
Tape
Image you want to transfer
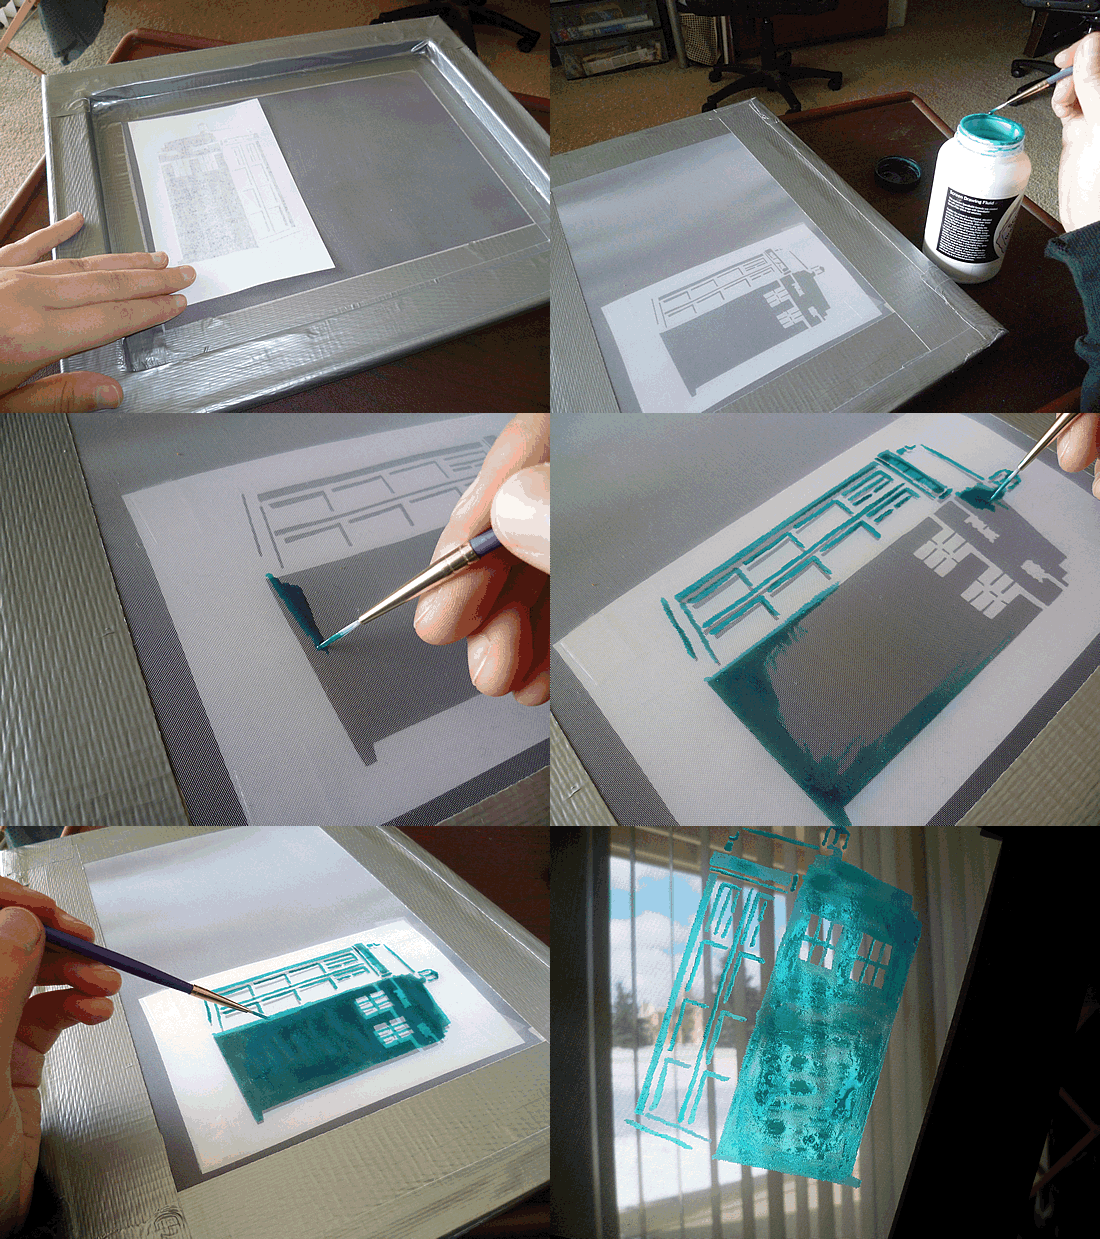
This should actually be prepared at least a day before you're actually ready to print.
Step 1: Find/draw/create an image you want to print. For this method thin lines and intricate detail are not impossible but are rather difficult to achieve so keep that in mind.
Step 2: Tape the image loosely to the recessed side of the frame so that you can see it through the screen.
Step 3: Using a paint brush (smaller brushes mean finer lines, bigger brushes mean more coverage) transfer your image to your screen with the drawing fluid. Be careful not to put too much drawing fluid on the screen at one time, it will pool and create thick gloppy areas that we do not want!
Step 4: Remove the taped image, wash your paint brush(es) and let the drawing fluid dry thoroughly, at least 3 to 4 hours. It might take less if you have less fluid to dry.
OK now you're ready to move onto applying the screen filler. This part is tricky and takes some practice to get down so don't be discouraged if it takes you a few tries to get the hang of it.
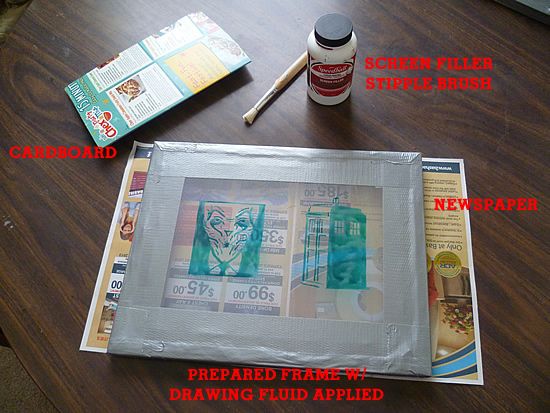
You'll need:
The prepared frame with drawing fluid thoroughly dried
A squeegee or stiff cardboard that is as wide as your frame
Newspaper
A spoon
A stipple brush or stiff brush
Sponge and sink (sorry, not pictured)
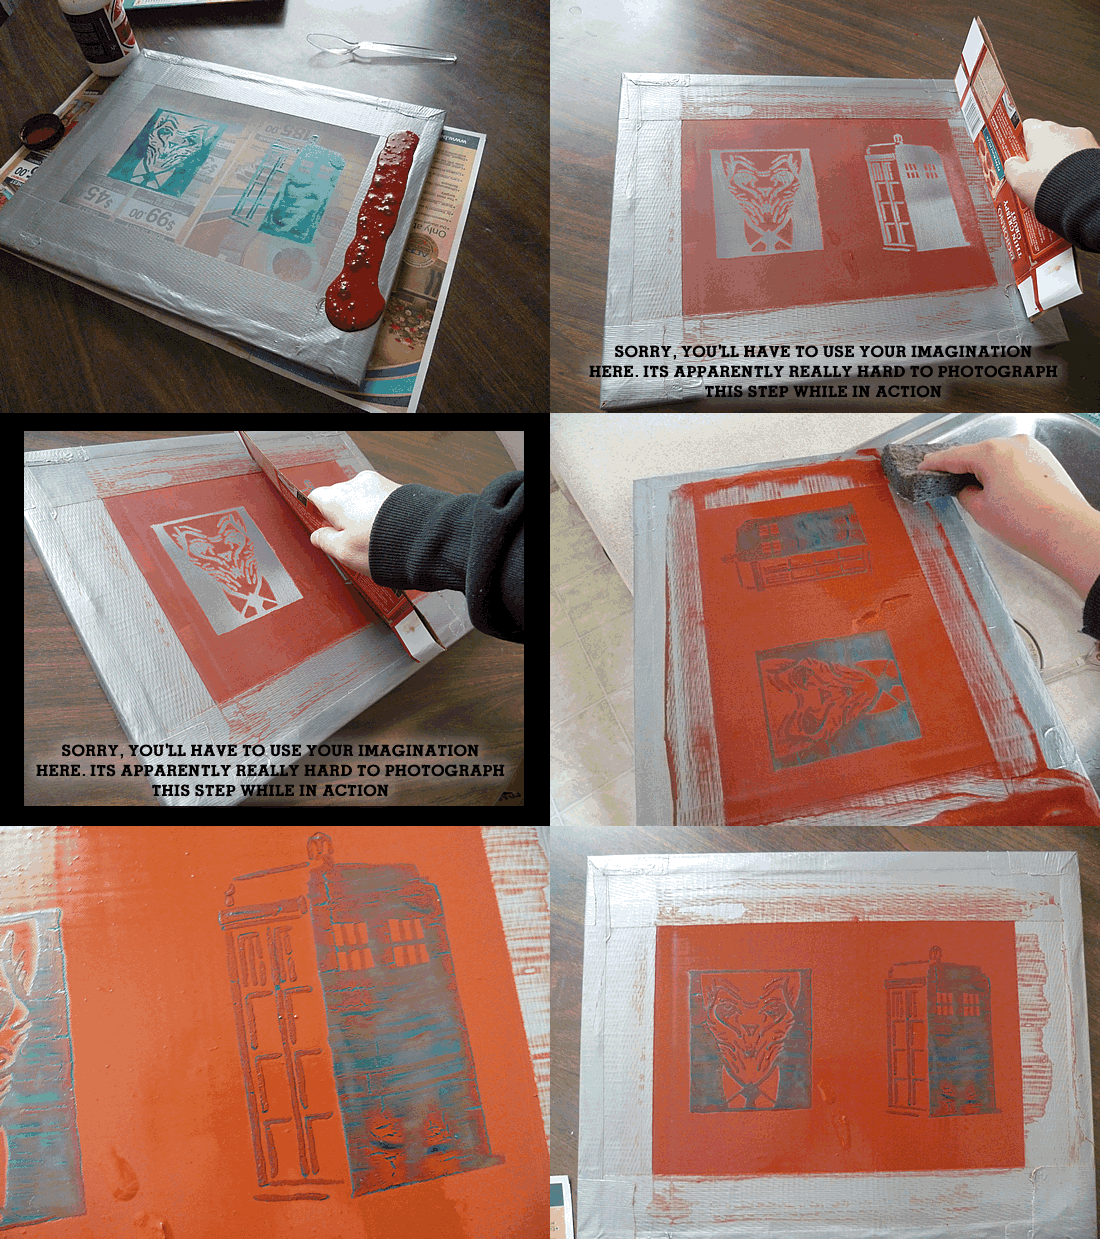
Step 5: Lay down newspaper or something to protect your working surface
Step 6: Place your screen down, flat side up.
Step 7: Get your screen filler and shake well.
Step 8: Open the bottle and carefully pour onto one side. Don't be stingey! If you don't have enough filler it won't spread smoothly and then all your work will be ruined and you'll have to start over. However, don't pour so much that it's dripping over the edge. Practice will help to master this delicate balance. (Worse case scenario: You make a horrible mess and it doesn't spread nicely, run it to a sink and wash it out quickly. You'll have to do the drawing fluid steps over again but it beats having to either buy screen cleaner or replace the mesh completely).
Step 9: Taking your squeegee, gently but quickly pull the filler to cover the entire screen. (My apologies, in the photo graphics above, I had an impossible time trying to get an action shot). You'll know you've done it correctly when the drawing fluid can be seen easily and all other surface is covered by the filler. Any excess filler can be returned back to the bottle if possible or washed with a wet sponge. BE VERY CAREFUL when you're cleaning up the frame that no stray water drops hit your frame – until the screen filler is dry it will be marred with water.
Step 10: Let the frame dry again thoroughly – this time overnight would be best.
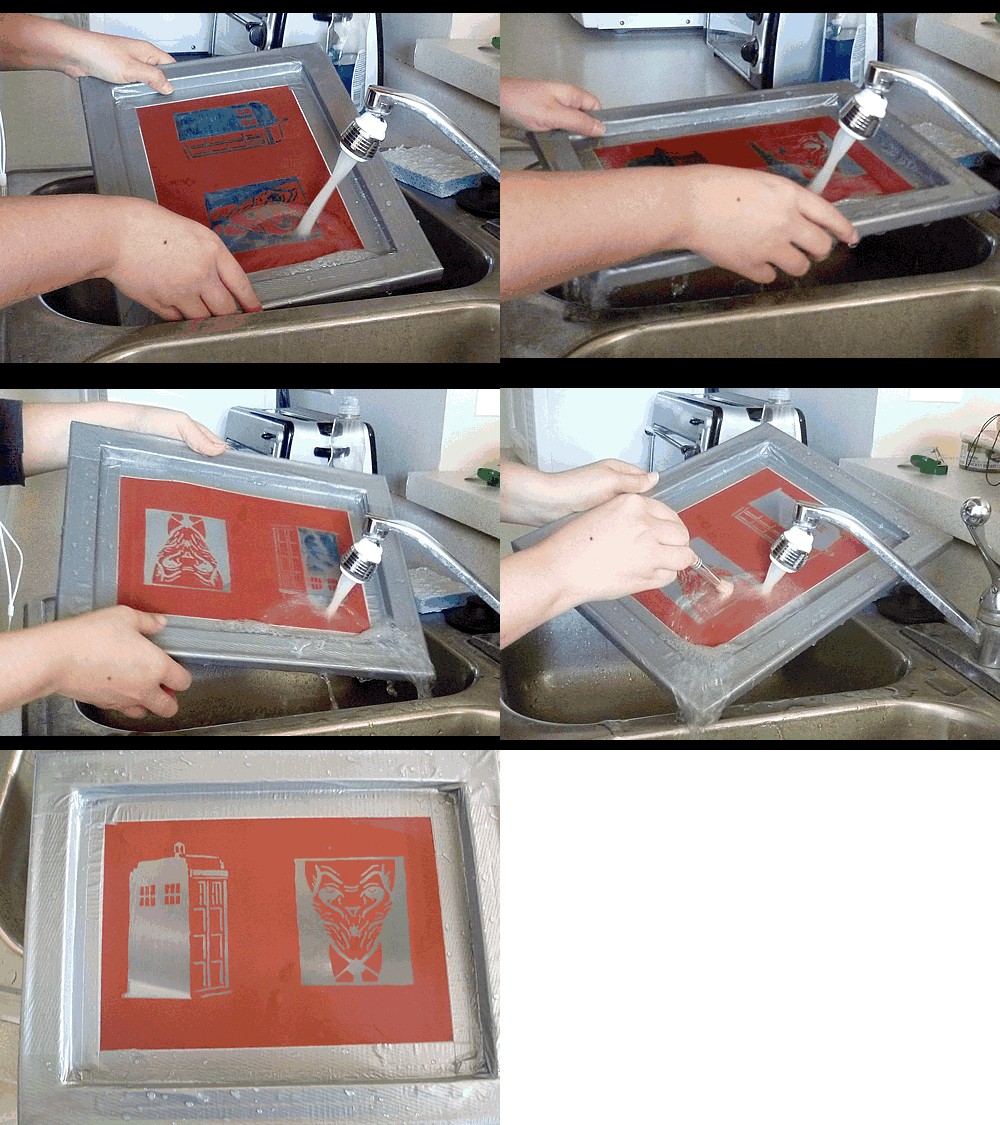
Step 11: Once the frame is dry, take it to the sink and run cold water on your frame. The drawing fluid is water soluble and will dissolve in the water, leaving you an excellent durable stencil to print with! If you have a little bit of trouble with screen filler blocking areas that had drawing fluid in it, try scrubbing with a rough paint brush or stipple brush.
Next: Printing!

Thank you so much for this information! I thought the only way you could make screens was to use transparencies and photo emulsion. Now I am not as scared to give this a try.
ReplyDeleteI've done it that way too, and it can have amazing results but I like this too. For at home printing I think this technique is a little more reliable for printing results.
Delete