Let me know if there's anything that seems unclear or if you have any questions. It's really not hard; just takes a little time and planning and then you're off! Printing is endless!
PART 1: BUILDING THE FRAME!
(This is the not so sexy part but still good to know for doing your own printing at home. Bare with me, it gets better and better.)
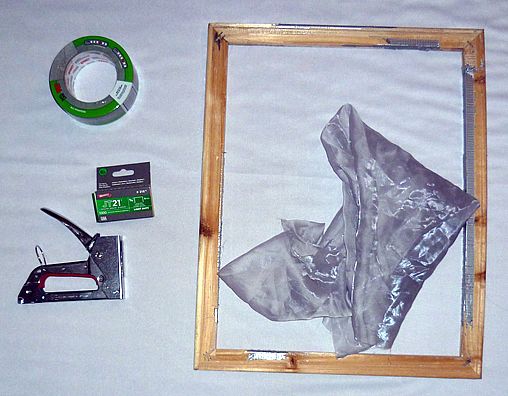
You will need:

A canvas easily found at your local craft store OR 4 stretcher bars OR a sturdy wooden picture frame
Screen printing mesh OR silk organza fabric OR mesh fabric
Staple gun and staples
Good quality duct tape (this is important!! I have found now that the DUCK tape brand sucks, a lot. Sorry but all those pretty colors and patterns are not worth having your frame being leaky and falling apart. Go to your local hardware store to get the real deal.)

Step 1: Assemble your frame if needed. If you got a canvas from the craft store, punch out the canvas fabric so that all you have is the wooden frame.
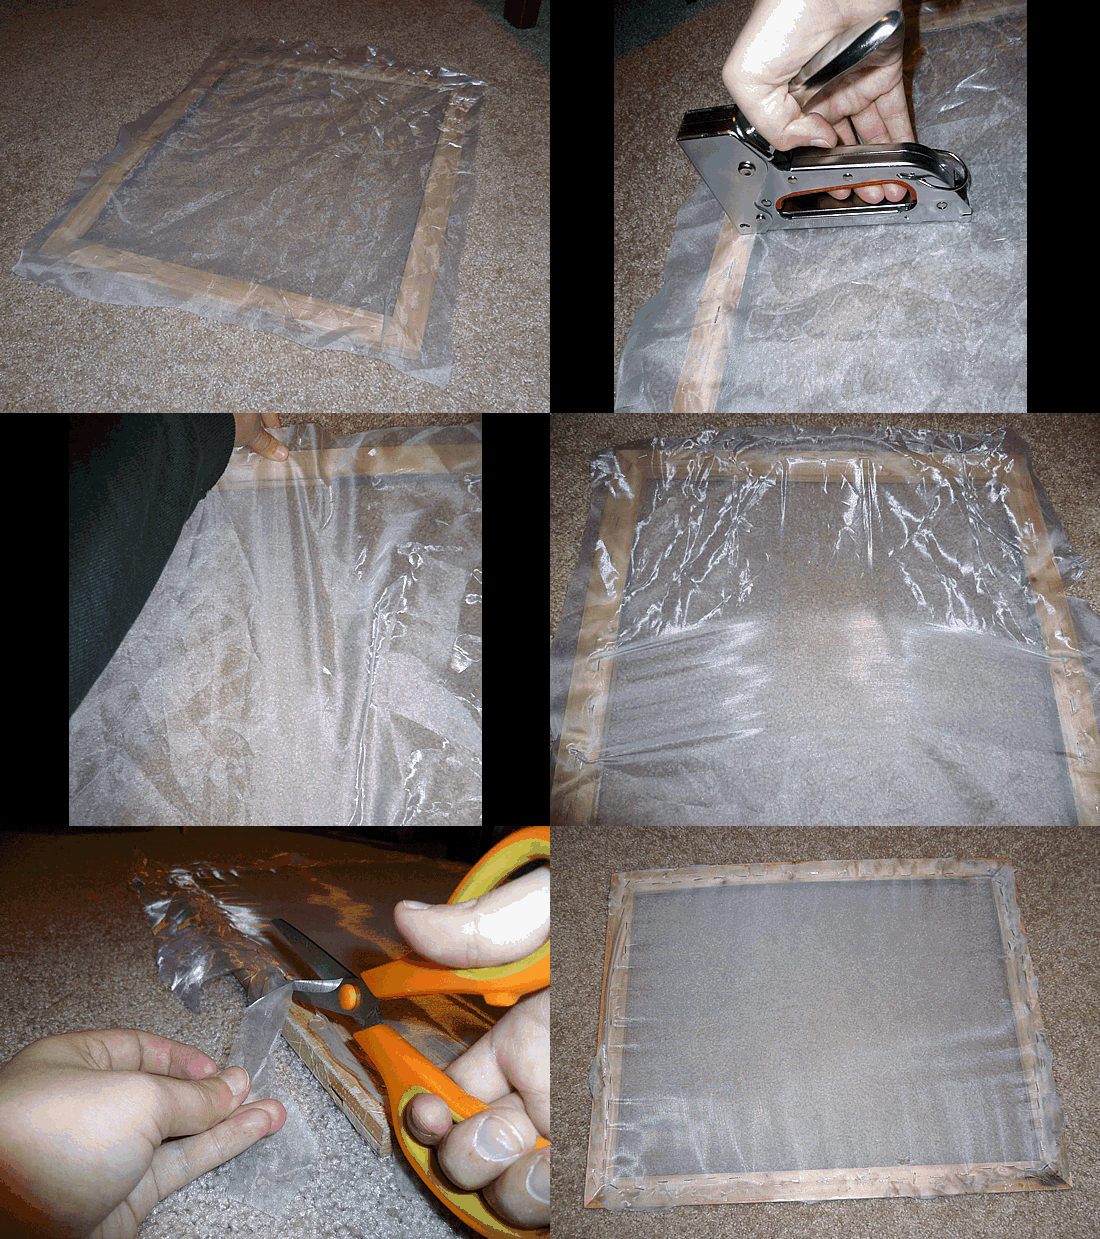
Step 2: Cut your mesh fabric to be slightly bigger than your frame – roughly 1 inch bigger will be plenty.
Step 3: Staple the fabric to the flat side of the frame. HOW: When stapling, start from the middle of one side, make three staples roughly 1 to 1.5 inches apart. Now switch to the opposite side, pulling the fabric taut (don't pull so hard as to rip the fabric but hard enough that you can see the fibers pulling) and staple three more times to match the first side. Now switch to the side just adjacent and start in the middle and put in three more staples. Switch to the opposite side and staple three more times. Continue stapling, making sure the fabric is taut at all times. This is crucial to make sure when you are printing that there isn't much give to the mesh. This will guarantee good printing results.
Step 4: Trim the fabric so that it is just slightly smaller than the outside of your frame. It doesn't need to be perfect.

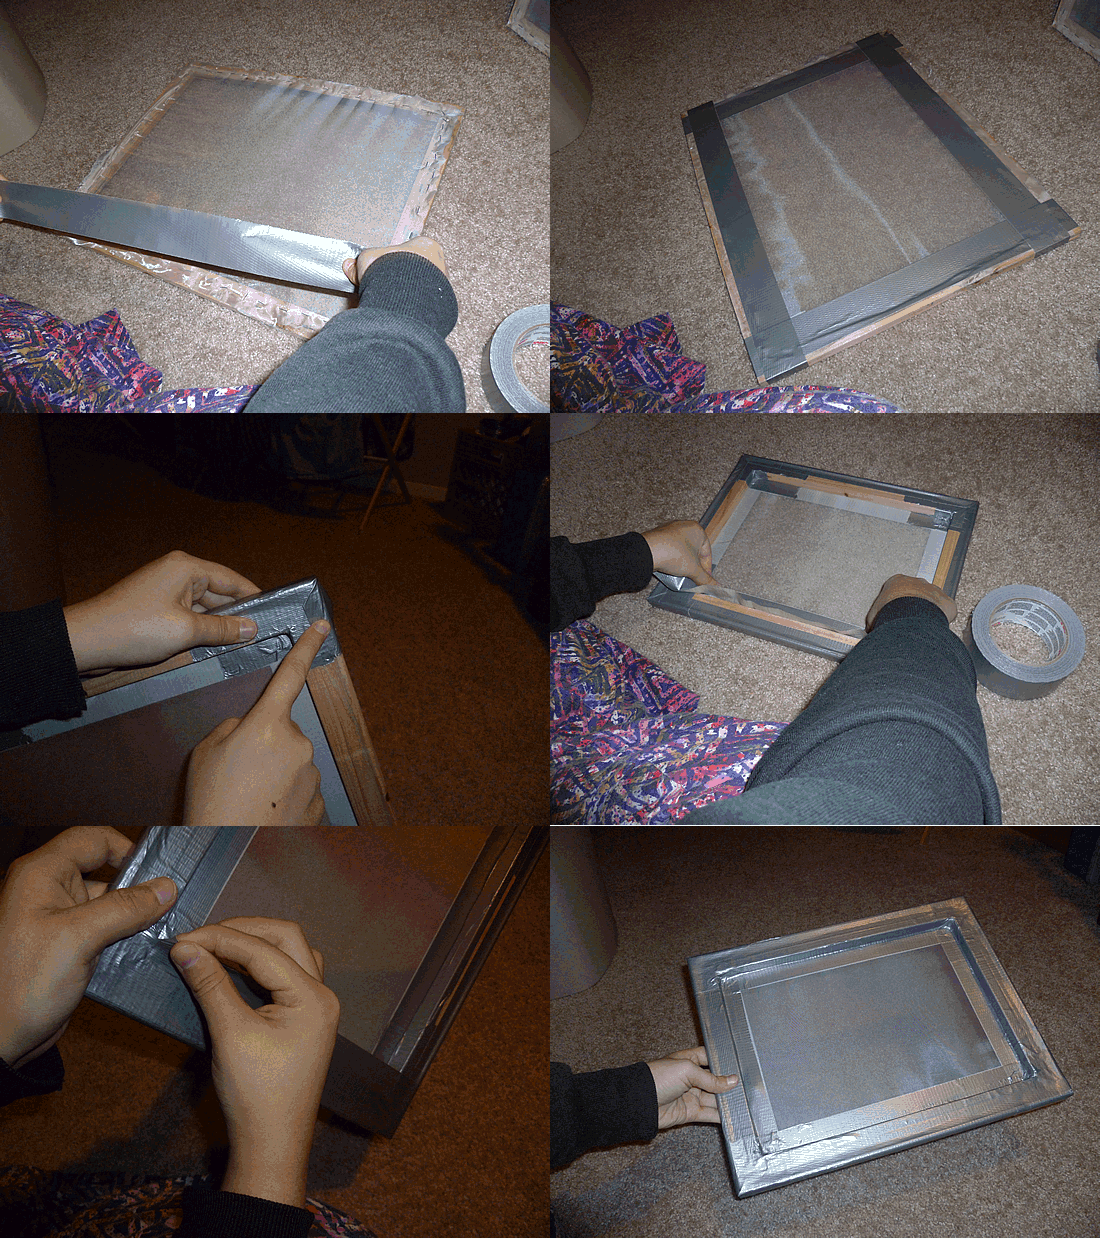
Step 5: Cover the frame in duct tape making sure to cover all staples and fabric, leaving a 1 to 2 inch border on all sides. HOW: Start with the flat side, laying tape on all 4 sides so that it goes over the line of the frame by 1 to 2 inches. Then begin another layer of tape covering from the edges of all 4 sides. There will be excess tape going over the corners. Tuck those in as neatly as possible. Flip the frame over and continue taping to the recessed area of the frame. Try to match up the overlapping tape from the front to the back closely. By taping up your frame you are now waterproofing it (relatively speaking) and making it much easier to clean and last longer.
You are now ready to print!
Stay tuned for the next part - what will you be printing and how are you going to put it on the screen?

No comments:
Post a Comment