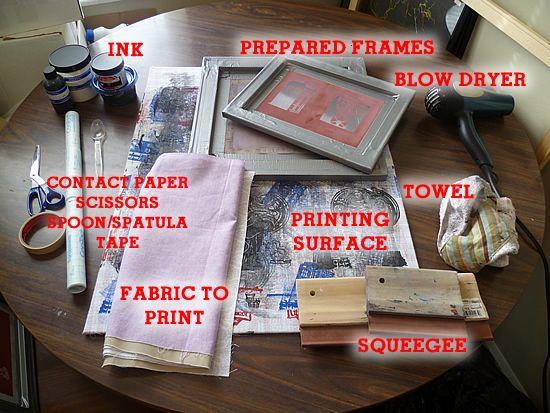
You will need:
Prepared frame (see above)
Squeegee (doesn't have to be fancy or elaborate, I bought mine relatively cheaply off Amazon)
Screenprinting inks (water based is easiest to work with – Speedball brand is easily found in craft stores, or dharmatrading.com, or dickblick.com)
Spoons, spatula, non-food-eating containers
Clear contact paper
Scissors
Masking tape
Towel (one that you don't mind staining)
Blow dryer (optional)
Large piece of cardboard other printing surface (I've used cardboard, plexiglass, glass, etc)
Large piece of scrap fabric.
Fabric to be printed (follow the directions on your screen printing ink, typically 100% cotton works best)
Sink/sponge
Step 1: Prepare your work surface. Take your piece of scrap fabric and tape it securely to the surface of where you will be working. This serves to absorb any excess ink that will bleed through your fabric. I use a piece of plexiglass that I've taped a large piece of fabric to as an example. YOU DO NOT WANT TO PRINT DIRECTLY ONTO A TABLE OR FLOOR! IT WILL STAIN!
Step 2: Lay out the fabric you are going to print on. If this is an item of clothing make sure that you have something sandwiched in between like cardboard to prevent bleeding on the back side of the clothes.
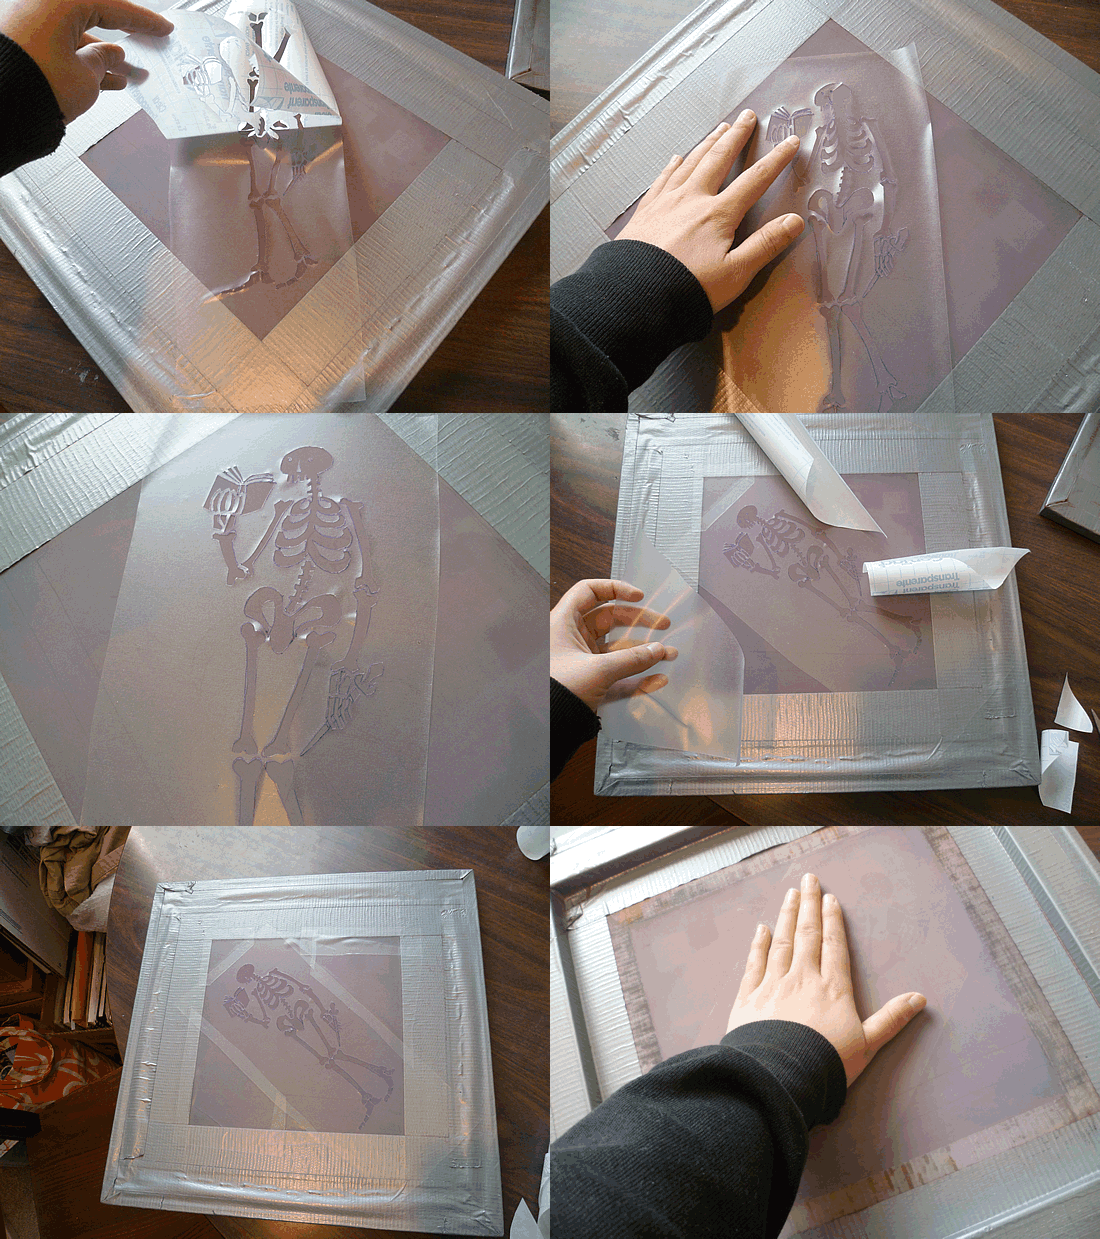
Step 3: Draw and cut out your contact paper stencil. Peel off the backing and apply it carefully to the flat side of the screen making sure to eliminate as many bubbles and wrinkles as possible. The flatter it is applied the better the print will be. Make sure to cover the remaining part of the screen with contact paper so that no ink shows through except for where you've cut the stencil. Flip it over so that the flat side of the screen is on the table and rub the recessed side of the screen with your hand vigorously. This creates heat which will help the contact paper bond even more with the screen.
Step 4: Figure out where you are going to be printing and lay the frame down.
Step 5: Spoon a liberal amount of ink onto the duct tape area at the top of your frame.
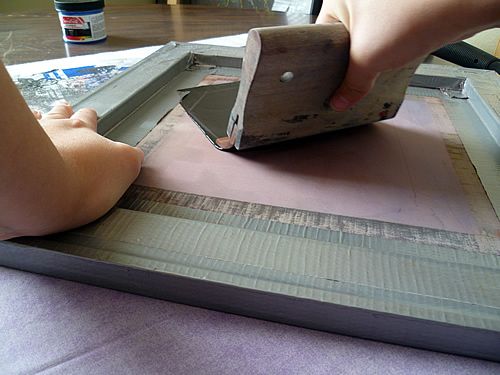
Step 6: Place your squeegee at the top making sure to dab it in the ink first, and pull down firmly and smoothly to the bottom of the frame.
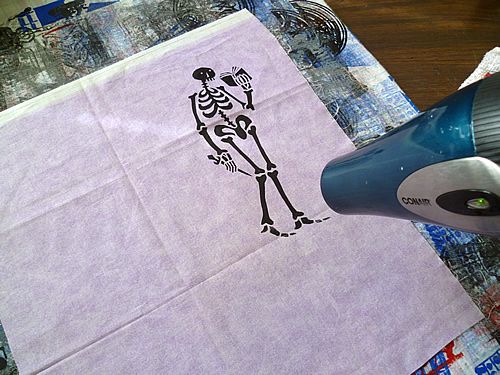
Step 7: Gently lift the frame. The fabric may cling to the frame so gently peel it away. Voila! You've printed. If you want to continue printing, either blow dry the first print so that you can keep printing without worry that it'll smear, or be mindful that as you continue printing, your frame doesn't overlap the wet ink causing it to smear.
Step 8: Once you're done printing in the color of your choice, clean the frame right away! (Hint: It's best to work close to a working sink if at all possible) Do not let the ink dry on your frame because that will quickly ruin it. You should be able to leave the contact paper on the frame while washing, but be gentle. It needs to dry again to properly adhere for printing. You can speed up the drying time by blow drying the screen.
Step 9: Pick your next color and so on and so on.
Here's another little slideshow of me printing with the screen filler frame that I prepared before. Printing is done exactly the same way as mentioned above.
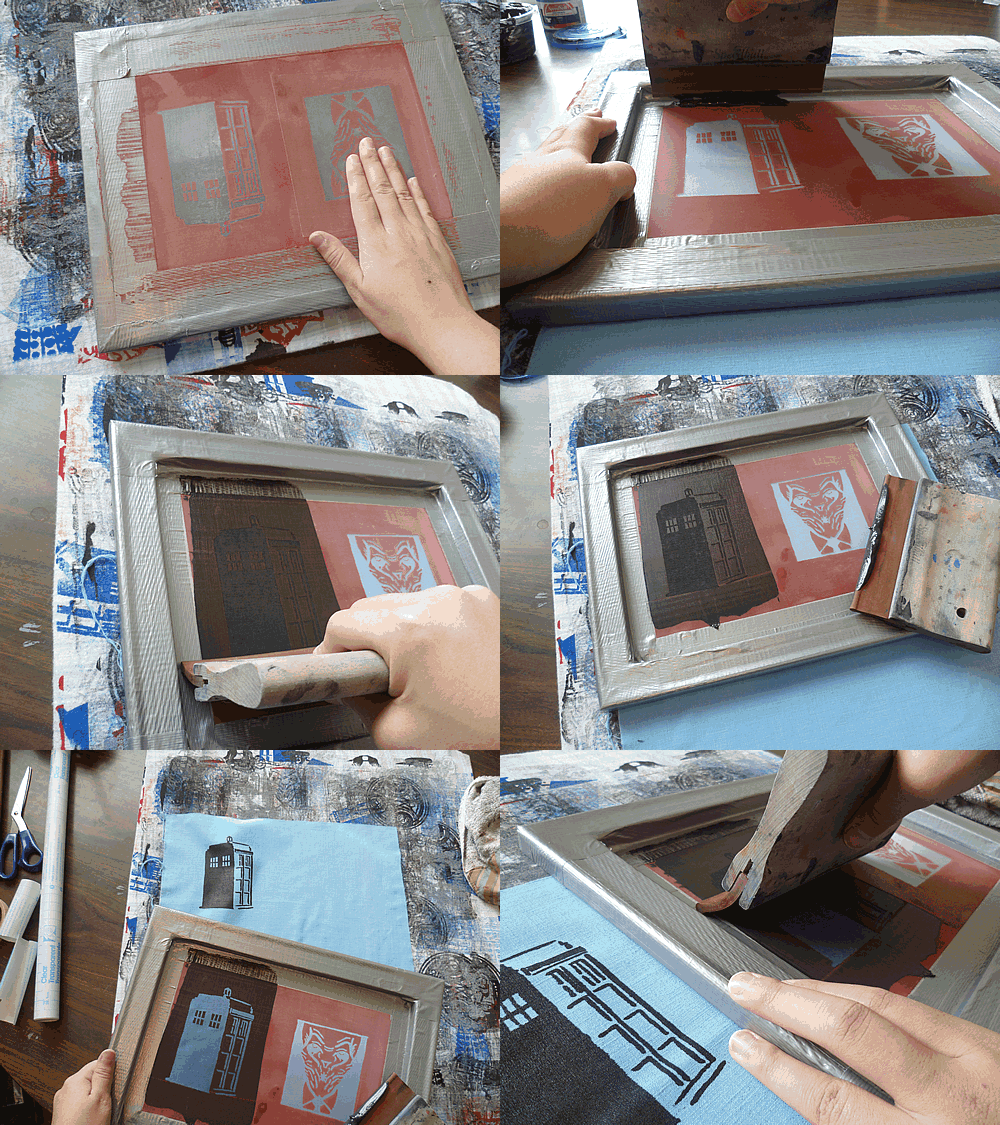
Easy peasy right?! Just make sure to clean up afterwards, and have tons of fun printing on everything in sight now =)

No comments:
Post a Comment